
 We decided to make a storyboard, not only so we could visualize the layout of our opening sequence, but also for us to know how we will be shooting each specific shot. Hence why each shot is colour coded:
Yellow
|
CU
|
Green
|
MS
|
Pink
|
LS
|
The use of large sugar paper was essential since it's 3 people working over one storyboard so we needed space to be able to work on it simultaneously. Post it notes made it easy to move around when we decided to change the order of shots or made mistakes.
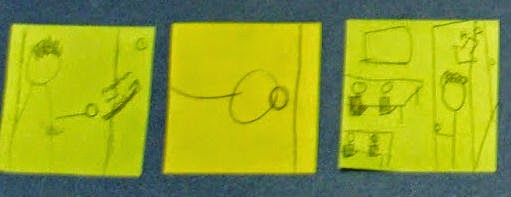 This mini sequence from our storyboard demonstrates the use of continuity as it has a match on action shot of the main characters hand on the door and then following that a master shot of the classroom he walks into.
 This mini sequence shows a shot-reverse-shot, another continuity technique we will use in editing.
 This sequence helps us visualize the split screen idea we want to implement during our editing stage where we combine up to 3 shots on screen for the audience to see simultaneously. This is because we want our routine part of the opening sequence to move fairly quicklu and not dominate the main part of our opening which will be the corridor scene.
Before we produced a storyboard we created a timeline so that we can get the timing of our shots before visualizing them. It was a very basic timeline with just a short description of each scene shown below where each piece of paper representing 30 seconds of the 2 minute sequence. Making a timeline made the production of a storyboard easier. Here is 30 seconds of our timeline that we made.

No comments:
Post a Comment